
The Ultimate Magnetic Gray Paint for Your Walls
When it comes to reimagining your workspace or home, paint can do wonders. But have you ever considered magnetic gray paint? Below we take a look at this option, answering all your questions about why you should consider it, how to apply it and even some exciting options to enhance your new magnetic wall.
Why Choose Magnetic Gray Paint?
Are you wondering why you should opt for magnetic gray paint over traditional options? Here are some compelling reasons:
Exceptional Magnetic Performance
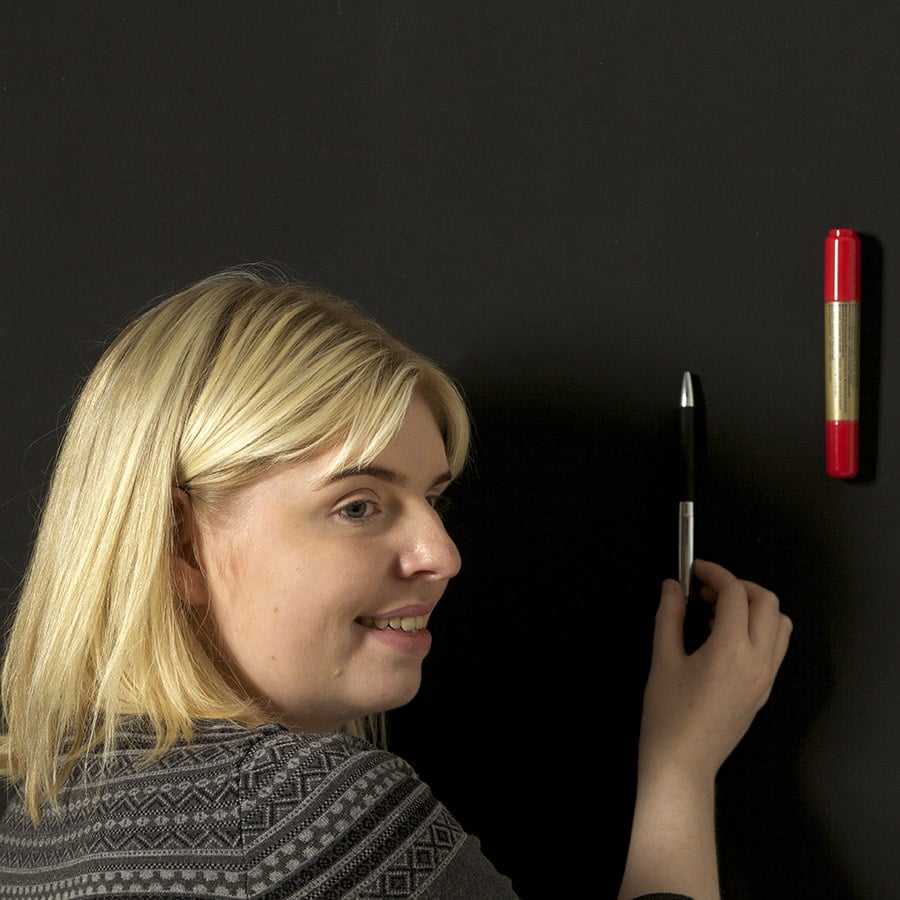
Super Magnetic Paint – 65 sq ft offers a level of magnetism that is off the charts, containing over 60% magnetite and capable of holding up to 5 pages with just one small magnet.
Customizable Finish
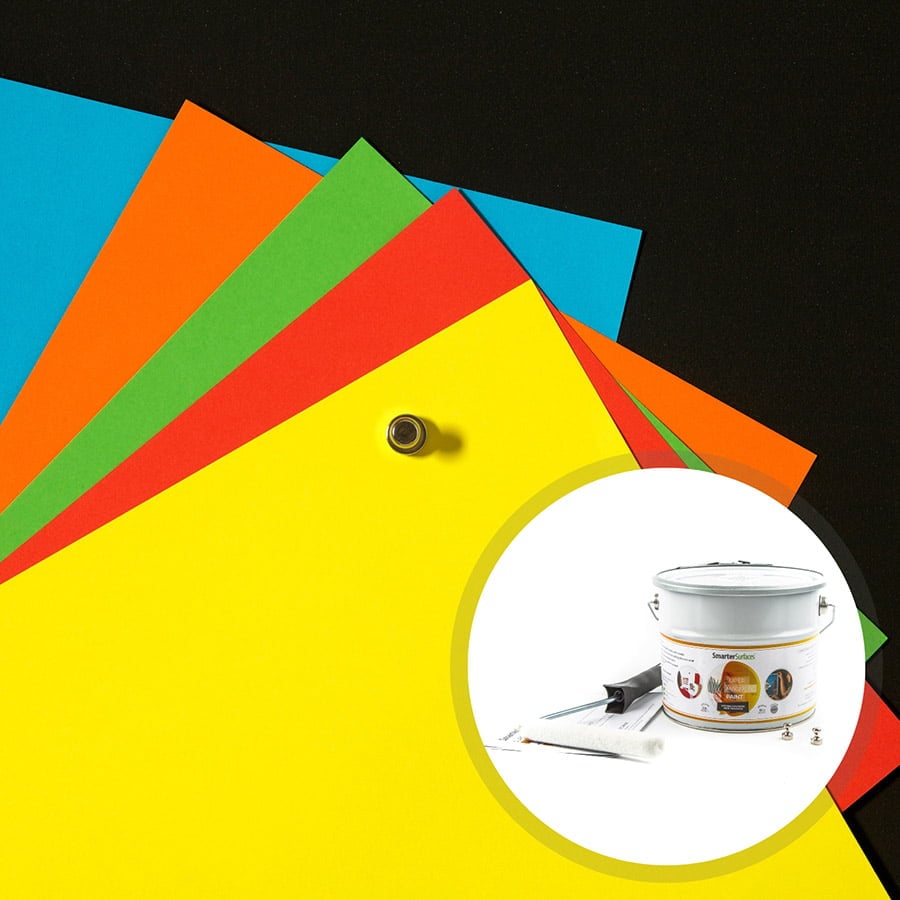
One of the many benefits of magnetic gray paint is that it’s incredibly versatile. You can easily topcoat it with any color, digital print, or wallpaper to match your environment.

Transform Collaborative Spaces
Magnetic gray paint can revolutionize the way you interact in spaces like offices, classrooms, and meeting rooms.

Upgrade to Create Multi-Functionality Surface
For those looking to amp up the functionality, you can topcoat your magnetic surface with Smart Whiteboard Paint for a dual-function dry erase and magnetic surface.

Environmentally Friendly
Another reason to opt for any of the paints in our range is that they are low VOC, solvent-free, and isocyanate-free option, surpassing US industry standards.
How to Apply Magnetic Gray Paint
One of the main questions we get asked before customers purchase our products is, how exactly do you apply magnetic gray paint? Is it a difficult process filled with complicated steps? The short answer is no, it’s incredibly easy to apply on any smooth surface. Let’s get into the details.
Before diving into the application process, make sure you gather all the essential tools and materials to ensure a smooth and successful project.
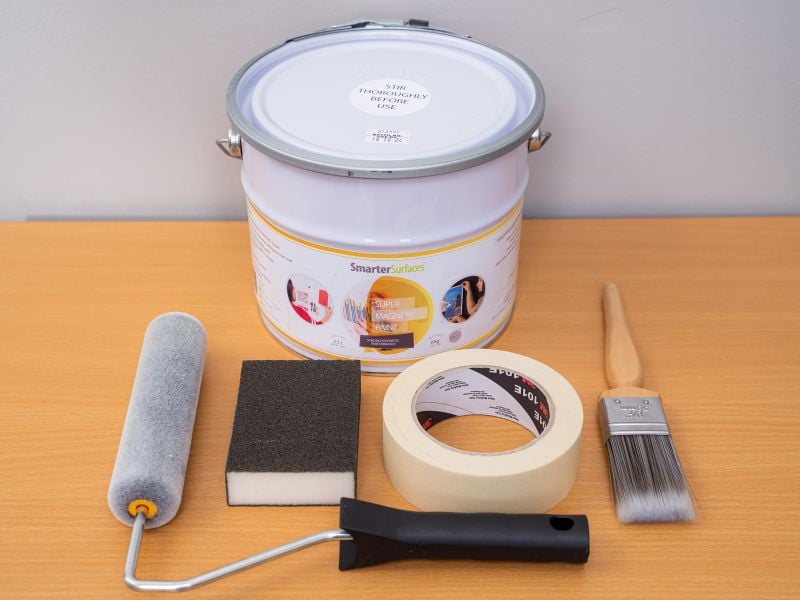
Here’s what you’ll need:
- Magnetic Gray Paint: Our Super Magnetic Paint – 65 sq ft is the star of the show, make sure you have enough to cover your measured area.
- Measuring Tape: To accurately measure the area you wish to cover.
- Decorator’s Filler: For filling any holes or cracks in the surface.
- Sandpaper: To smooth out the surface between coats. Use a higher grit sandpaper, like 220.
- Masking Tape: To mark the area you are painting.
- Smart White Primer: A coat of our primer will prepare your wall for the magnetic gray paint.
- Paint Stirrer: To ensure the magnetic gray paint is well-mixed.
- Paint Roller or Brush: Depending on your preference, you’ll need either a roller and/or a brush to apply the magnetic gray paint. If using a roller, opt for a short pile sleeve. We’ve already include one in your kit.
- Clean Cloth: For any clean-up or wiping down the wall before and after application.
- Magnets: For the best performance after the paint has dried, use Smart Neo-Magnets
Step 1: Measure Your Area

Before you even open the tin oif paint, it’s crucial to measure the area you intend to cover. Super Magnetic Paint covers an area of 6m2/ 65 sq. ft. with 4 coats. You’ll want to ensure you have enough paint to complete your project effectively.
Step 2: Protect Surfaces You’re Not Painting
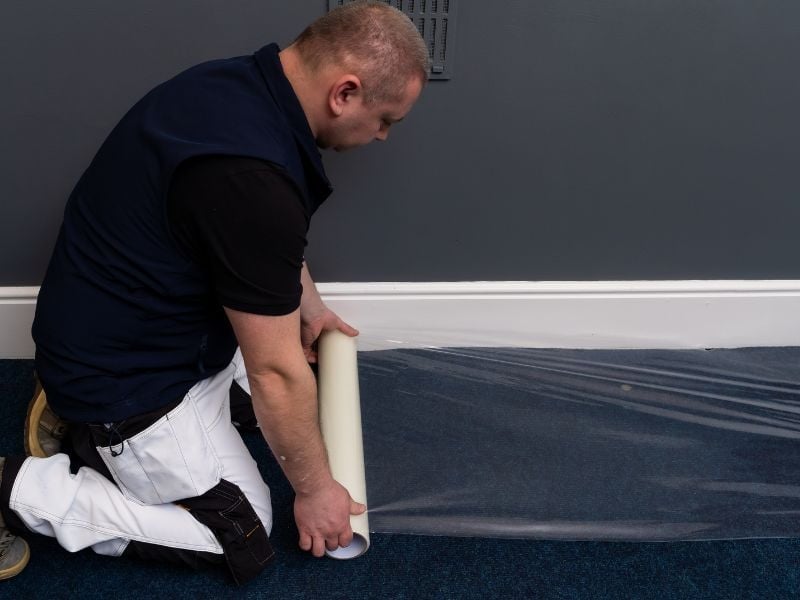
Before you begin painting, it’s crucial to protect the floor and any furniture in the vicinity. Lay down a drop cloth or plastic sheeting to catch any paint spills.
Step 3: Mask Off Sections
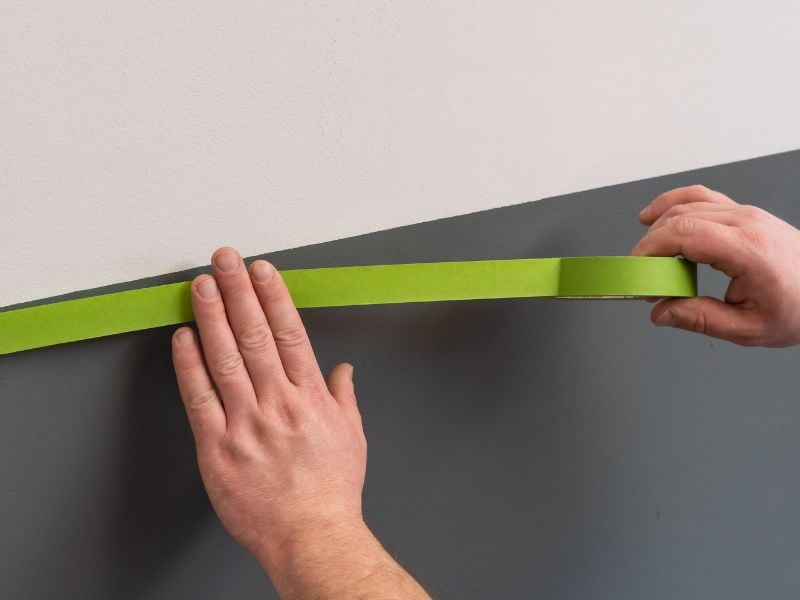
If you’re only painting a section of the wall, use painter’s tape to mask off the area you want to keep paint-free.
Step 4: Prepare Your Surface

This is a critical step in the application of any paint, but especially for magnetic gray paint. The surface should be clean and dry and free from holes or cracks.
Step 5: Fill Any Holes

If you spot any holes or cracks, make sure to fill them with a regular decorator’s filler.
Step 6: Sand and Clean

After the filler has dried, lightly sand the surface to smooth out any imperfections. Then, use a clean, damp cloth to wipe away any sanding residue to ensure a clean surface for the primer.
Step 7: Stir and Apply Primer

Once the surface is prepped, apply one coat of Smart White Primer to make it ready for the magnetic gray paint.
Step 8: Stir Paint
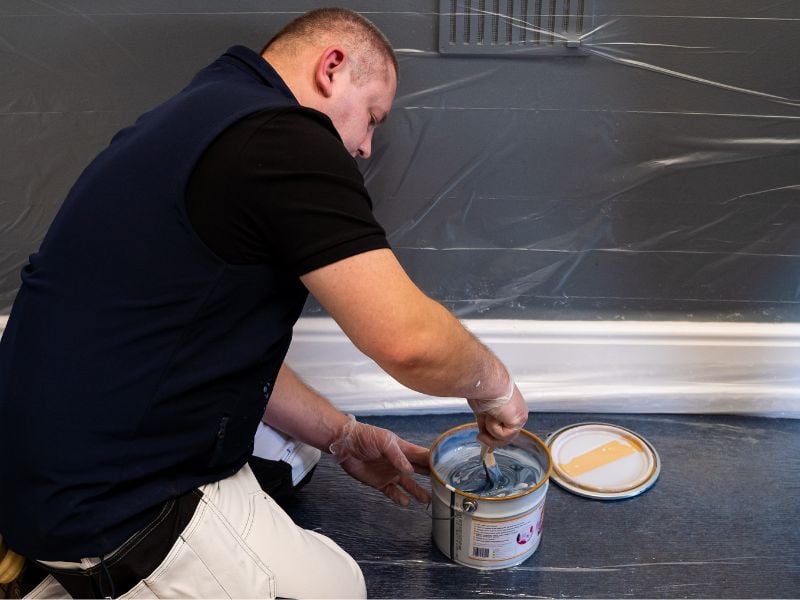
The next step is to stir your magnetic gray paint for 5 minutes so the magnetic filaments are well dispersed. Make sure you stir it thoroughly for consistent application.
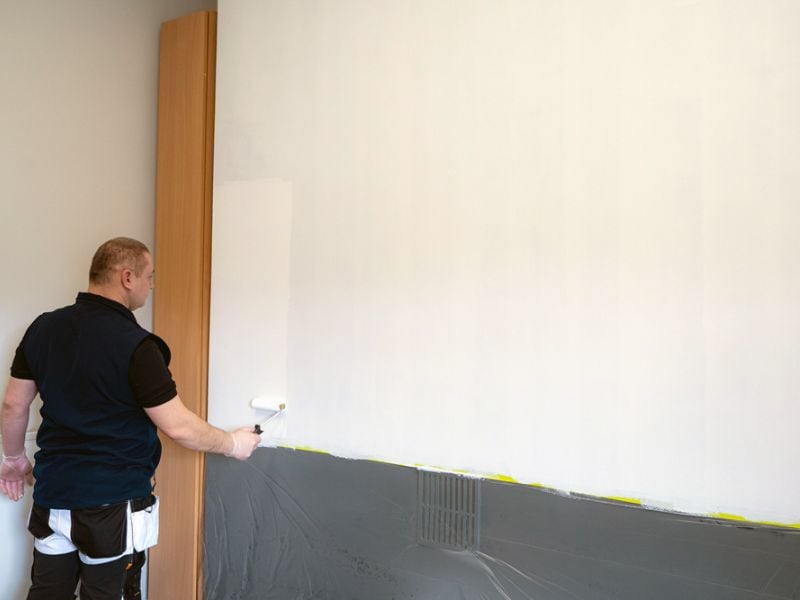
Step 9: Apply Paint

Apply first coat of magnetic gray paint. Whether you’re using a brush or a roller (if using a roller, opt for a short pile sleeve), the application process is simple. The key is to apply the paint smoothly and evenly, then allow it to dry before proceeding to the next coat.
Step 10: Sand The Surface

After you’ve applied each coat of magnetic gray paint, you’ll need to very lightly sand the surface. This step ensures that your magnetic wall will have a smooth finish, free of any rough spots that could potentially interfere with its functionality.
Step 11: Apply the Next Coats

For optimal results, you will need to apply three more coats of magnetic gray paint. Apply each coat smoothly and evenly, then allow it to dry before proceeding to the next coat. Once all coats are applied, give it a final sanding to prepare for any additional finishes you might want, or if you are leaving the top coat as the final coat, do not sand the last coat.
Step 12: Allow To Dry
Patience is key when working with magnetic gray paint. After you’ve completed the sanding, allow the surface to dry for a minimum of 24 hours. This ensures that the magnetic properties are fully activated and the surface is ready for overcoating or other finishes.
Step 13: Use Your New Surface with Neo Magnets

Congratulations, you’ve successfully applied your magnetic gray paint. But before you start sticking anything to your new magnetic wall, consider the type of magnets you’ll use. For best performance, we recommend using Smart Neo-Magnets. Ordinary household magnets simply won’t do the job as effectively.
Step 14: Additional Functionality
If you want to add dry erase capabilities to your magnetic gray paint surface, you can topcoat it with Smart Whiteboard Paint. This will create a multi-functional area that not only serves as a magnetic board but also as a writable surface.
Additional Finishing Options for Your Magnetic Gray Paint Surface

Your new magnetic surface can be more than just magnetic. Here are some exciting finishing options to consider:
- Dry Erase: Add dry erase functionality to your surface by applying Smart Whiteboard Paint.
- Wet Erase: To add wet erase capabilities, consider applying Smart Blackboard Paint on top of your wall.
- Colour of Choice: Don’t feel constrained by the gray. Pick a color of your choice and apply it over your magnetic gray paint to match your décor.
Frequently Asked Questions

How long does it take for magnetic gray paint to dry?
It takes a minimum of 24 hours for our paint to fully dry before you can apply additional coatings or finishes.
What type of magnets should I use with magnetic gray paint?
For optimal results, it’s recommended to use Smart Neo-Magnets. Ordinary household magnets are not strong enough to hold items effectively on a magnetic surface.
Can magnetic gray paint be used outdoors?
While our paint is incredibly versatile, it is best suited for indoor applications. For outdoor applications, ensure the area is covered to protect the surface from weather elements.
Is magnetic gray paint safe for children’s rooms?
Yes, all the paints in the Smarter Surfaces range are low VOC, solvent-free, and isocyanate-free option, making it safe for use in rooms with people of all ages, including children.
How many coats of paint are needed for optimal magnetism?
For the best magnetic performance, it is recommended to apply four coats of Smarter Surfaces Super Magnetic Paint – 65 sq ft.
Can I paint over Super Magnetic Paint – 65 sq ft with another color?
Absolutely, you can overcoat Super Magnetic Paint – 65 sq ft with any color of your choice. Just make sure to let the paint dry fully before applying another layer of paint.
Is magnetic gray paint easy to clean?
Yes, the surface of your paint is easy to clean with a damp cloth or sponge, especially if you’ve applied a dry erase or wet erase topcoat.
How long will magnetic gray paint’s magnetism last?
The magnetic properties of our Super Magnetic Paint – 65 sq ft are permanent as long as the integrity of the surface remains intact. This means you can enjoy your magnetic wall for years to come.
